How to draw Lily: From very ancient times lily flowers have deep mankind symbolic meaning. It represents innocence, wealth, sympathy, or friendship. Also, the history of being included in the artwork is also very ancient since 1580 B.C.
In western culture, lilies are also used to represent the 30th wedding anniversary. Mostly white and pink lilies are famous worldwide. Would you like to draw a lily for yourself or for your loved ones?
Get ready with the tools. As always you only need a pencil, pen, or marker, and follow the step-by-step tutorials adding color to your drawing is optional.
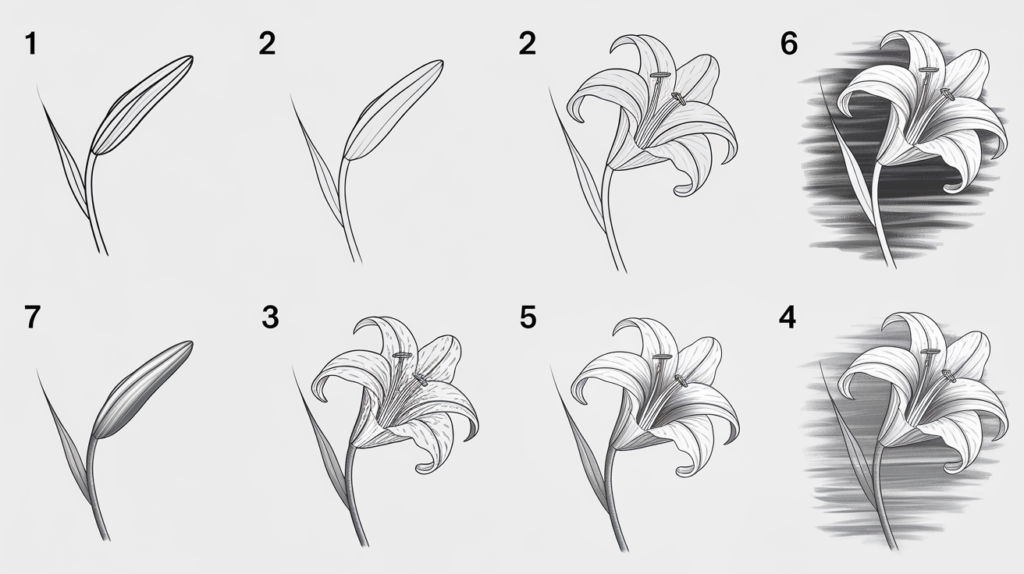
How to draw lily flowers:
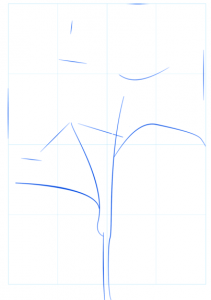
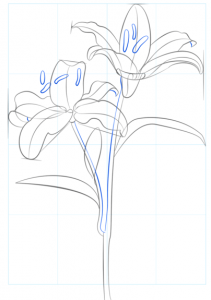
Step 1: Lily flowers have broader petal arrangements and sleek long leaves. Thus according to the flowers measure draw guideline, refer to the image given below.
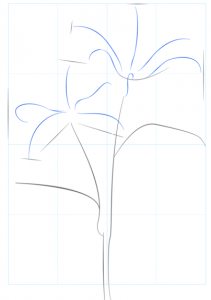
Step 2: On the top of the leaf stem outline draw number of lines coming out from the same point and going in outward direction. These will be outlined for the flower petals.
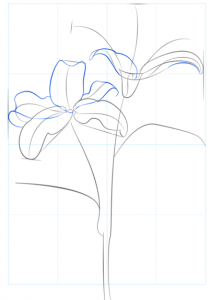
Step 3: Start drawing flower petas. Firstly start with drawing outer petals. Use series of a curved lines on the outer side of the outline drawn.
Step 4: Once you are done with outer leafs draw the central petals using the same type curved line.
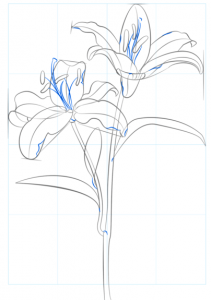
Step 5: Then in this step draw the flower petals for the second flower. The central petal is in an upward direction. there is no certain way for the arrangement of petals. They can vary in shape.
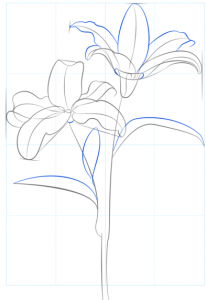
Step 6: Draw long, flat, sleek, tubular stamen. Arrangements of stamen are random. Finish the stem of the flower.
Step 7: Attach the stamen with the flower center and give a finishing touch to the whole drawing.
Step 8: Contour your drawing and vary the thickness and darkness of the flower. Give a detail, add some dots in the petals.
Step 9: Erase all guidelines and extra lines to get a clear and beautiful picture.
How to draw lily for kids:
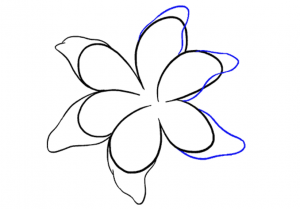
Step 1: Begin your drawing with an irregular oval with an open end. Join this oval with the other similar oval and similarly the third one. The opening side must be inward and in the center.
Step 2: Enclose the shape with a similar pattern of 3 more petals. Draw 2 petals overlapping the adjacent one.
Step 3: Extend the length of the petals using curved lines. Form the blunt top end of petals using irregular curved lines.
Step 4: Erase all the overlapped lines from the petals. You will get a flower with a long sleek pattern.
Step 5: From the center of the flower draw long parallel lines in the left outward direction. The top of every line is oval in shape.
Step 6: Extend two parallel lines from the below of the flower going downward. On both sides of the stem draw small, pointed end 2 leaves. Draw curved lines in between the petals and the leaves.
Step 7: Give a texture to the flower by adding small dots and circles over the petals.
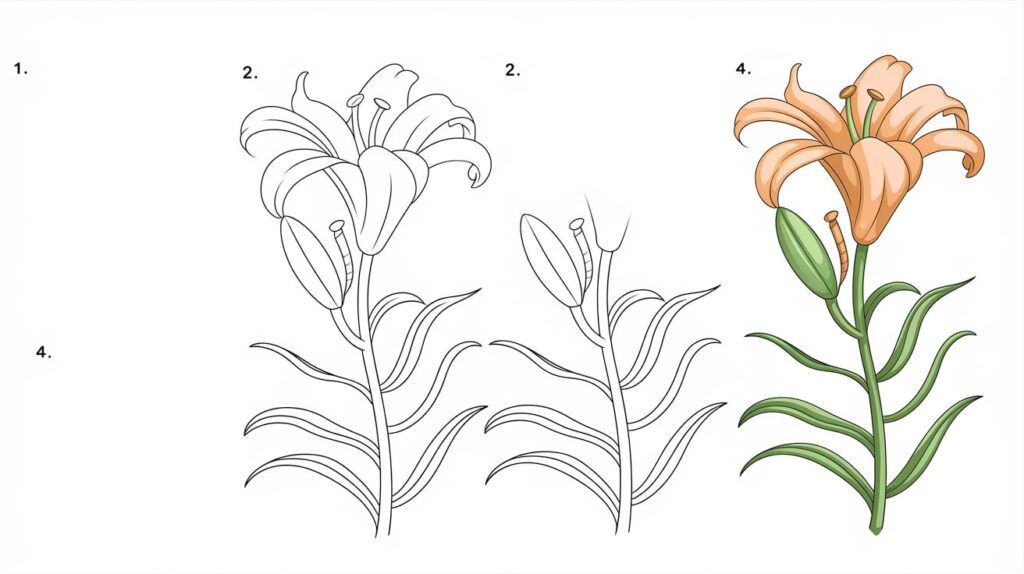
Step by step lily flower drawing for kids:
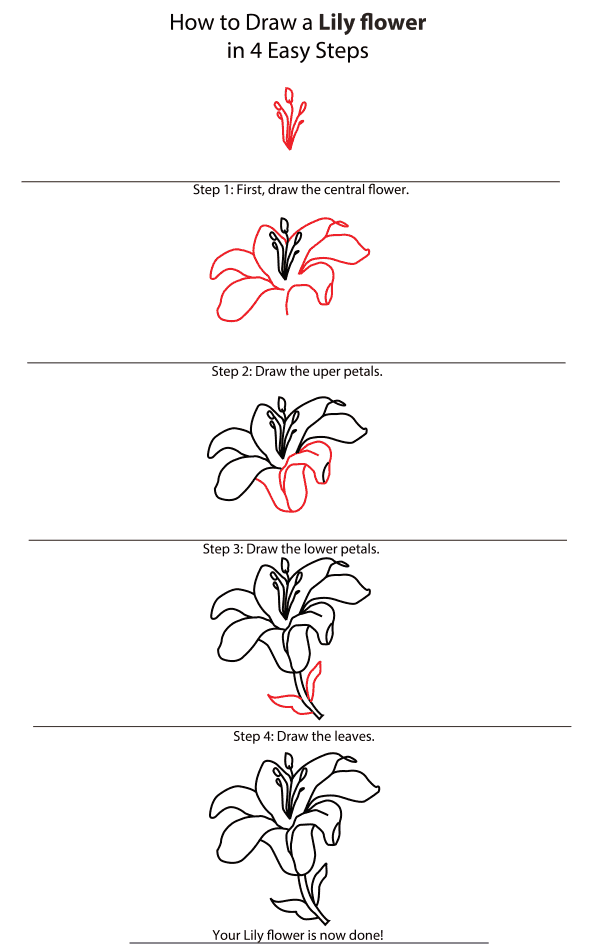
Drawing step-by-step lily flowers is an easy task, we have given a step-by-step tutorial that will help you to draw lily flowers in just 4 steps.
Drawing a lily step by step involves a series of simple shapes and lines that gradually come together to form the flower. Here’s a step-by-step guide to help you draw a lily:
Materials Needed:
- Pencil
- Eraser
- Paper
- Optional: Colored pencils or markers for coloring
Step-by-Step Guide:
- Draw the Flower’s Center:
- Start by drawing a small oval shape in the center of your paper. This will be the base of the flower where all the petals will connect.
- Add the First Petal:
- From the top of the oval, draw a long, curved line that extends upward. This line should then curve back down to the center oval, creating a teardrop-shaped petal.
- Repeat this on the opposite side, but slightly smaller, to show perspective.
- Draw Additional Petals:
- Add more petals around the center, overlapping them slightly to create a natural look. Lilies typically have 6 petals, so aim to draw 3 large, visible petals and 3 more behind them that are partially hidden.
- Detail the Petals:
- Once all the petals are drawn, add details by drawing the central veins on each petal. These are thin, slightly curved lines that start from the base of the petal (where it meets the oval) and extend outward.
- Draw the Stamen:
- In the center of the flower, draw several thin, curved lines that extend upward from the center oval. At the top of each line, draw a small oval or rounded shape to represent the stamen’s anthers.
- Add the Stem:
- Draw two parallel lines extending downward from the base of the flower to form the stem. You can slightly curve the lines to give the stem a more natural appearance.
- If desired, add some leaves on the sides of the stem by drawing elongated, curved shapes.
- Erase Guidelines:
- Gently erase any unnecessary lines or guidelines to clean up your drawing.
- Add Color (Optional):
- If you want to color your lily, use light, delicate colors like white, pink, or yellow for the petals. The stem and leaves can be shaded with various shades of green. The center of the flower and the stamen can be colored yellow or orange.
- Final Touches:
- Go over your drawing with a darker pencil or pen to outline and define the shapes. Add any final details or shading to give the lily more depth and dimension.
Summary:
- Step 1: Draw the flower’s center (oval).
- Step 2: Draw the first petal.
- Step 3: Add more petals around the center.
- Step 4: Detail the petals with veins.
- Step 5: Draw the stamen with small ovals on top.
- Step 6: Add the stem and leaves.
- Step 7: Erase unnecessary lines.
- Step 8: Add color (optional).
- Step 9: Finalize with outlines and shading.
Now you should have a beautiful lily drawing!

Skilled teacher, knowledgeable in and in adapting state content standards to individual needs in
Elementary-6th grade classrooms. Utilizes instructional materials, technology, and teaching methods to
engage students in effective learning opportunities in individual, small group, and whole-group settings to
maximize instructional time. Differentiates instruction for ELLs while exposing them to rigorous content,
with a focus on literacy skills in all subject areas. Establishes and maintains appropriate standards of
behavior in an inclusive and respectful environment for students from all socio-economic and cultural
backgrounds. Develops lesson plans using Backwards Planning Method to align content standards and
assessments with effective learning activities. Communicates and collaborates effectively with staff and
parents, and creates a safe and positive learning environment for students. Has taught in both in-person
and virtual environments. Professional Communicator with 20+ years of experience.

