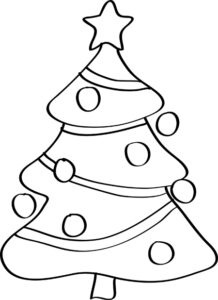
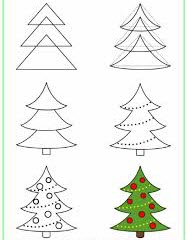
When the year is running out to be able to make our year-end how to draw a Christmas tree is the most common search among kids.
In ancient times people use to worship evergreen trees during vacation and hung up Bruce trees at their doors and windows. So that they can be away from evil eyes. In today’s era artificial or original trees are used to décor with ornaments and lights at the time of Christmas.
It is a fairly easy drawing tutorial as I tried to turn it in the maximum steps possible. There are many ways to draw your Christmas tree, make it a simple triangle or complex curvy to look more natural and décor it.
In this tutorial, we are taking the middle road and drawing a decorated Christmas tree.
How to draw a Christmas Tree Step by Step
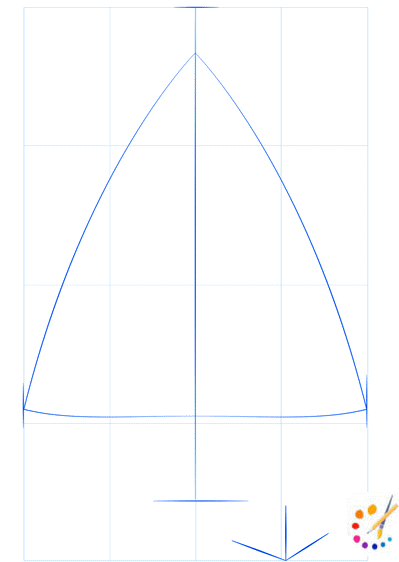
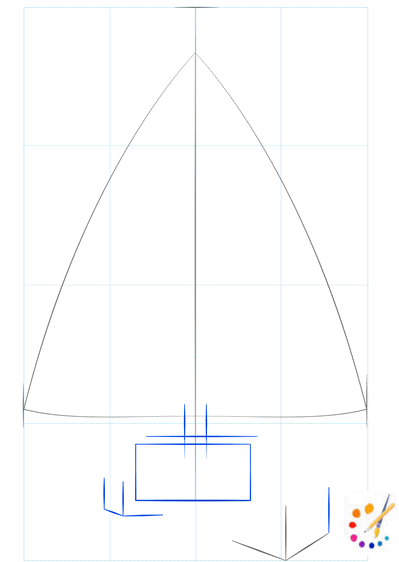
Step 1: You have to draw a star for the top of the Christmas tree. You can refer image given below. It’s a little tricky, thus, before starting to practice it a few times.

Step 2: Draw 2 lines under the star slopping downward, one is to the left and the other to right. Lines drawn should be of the same length, add few spikes for pine needles at the bottom.
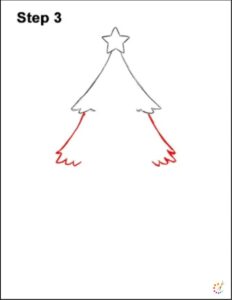
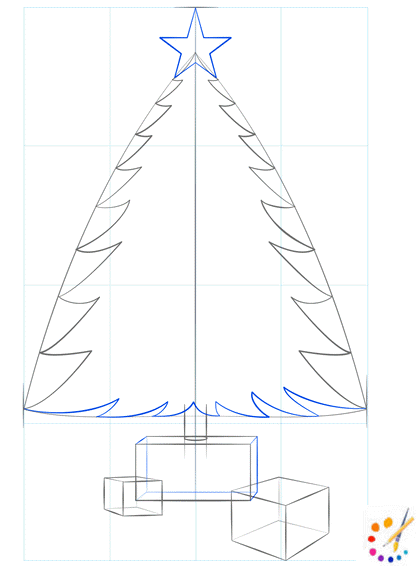
Step 3: After step 2, Draw 2 more lines from the last drawn shape but a little bit longer and wider from them. In this formation again add some lines for pines.
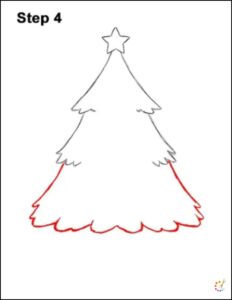
Step 4: Below this second formation draw one more pair of slopping lines for the bottom portion. If you want to make your tree more long add few more such steps. By drawing a wide curved line close to the bottom of the tree.
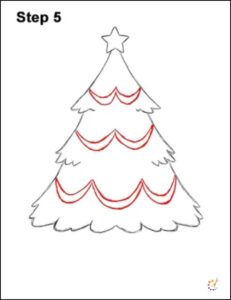
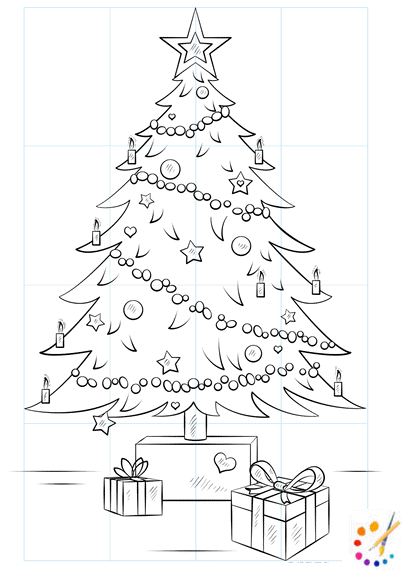
Step 5: Now start decorating your tree, for this draw ribbons by using curved lines. It doesn’t need to be perfect, refer image given below for guidance.
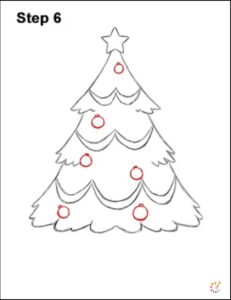
Step 6: Draw small circles as ornaments randomly on your tree, leave space for other decorations also.
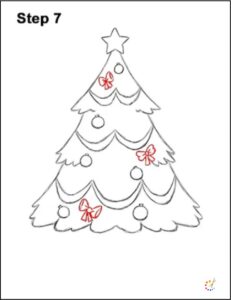
Step 7: On the empty places draw ribbon bows (the one we place on gift rapes). If you find it difficult add more round ornament or star shape to your tree.
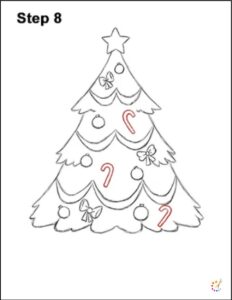
Step 8: Suppose you have to draw a bigger Christmas tree for your self hang some candy canes. Draw upside down J shape for it.
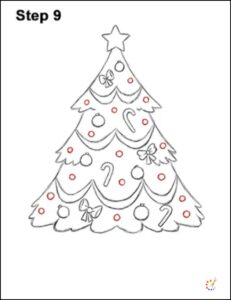
Step 9: As I have a space on my tree adding a few more random circles, you can skip if your tree is getting crowded. Leave it neat and clean, a more clumsy look will spoil your Christmas tree.
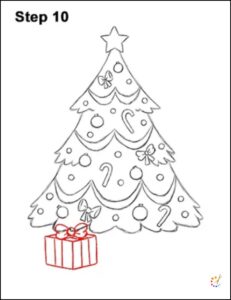
Step 10: Kids wait Christmas for gifts, thus draw few gift boxes at bottom of the tree. For the gift box draw a cube with few lines on it and bow on top to give it the look of a wrapped gift box.
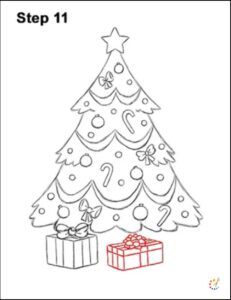
Step 11: You must need a few more gifts for your friend or sibling. Add another gift box with the same technique but of a different size.
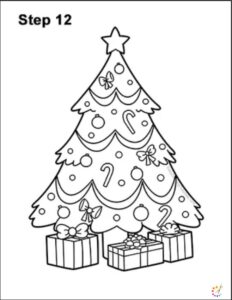
Step 12: This is the final step of drawing. Add few details to your tree and darken it with a marker, erase the extra line.
Step 13: This is the final step, color your tree green and all ornaments with the choice of your imaginations. You can go with the image given below also. Try to color it neatly and slowly.
Your Christmas tree drawing is ready to get placed in its place and flaunt the happiness and beauty of the festival. There are several ways to draw it, it’s all up to you.
Christmas Tree Drawing
Step 1:
Step 2:
Step 3:
Step 4:
Step 5:
Step 6:
Step 7:
We hope this drawing tutorial will help you in celebrating your eve and vacation. You can see how to draw a Christmas tree and other drawing tutorials also from our page.
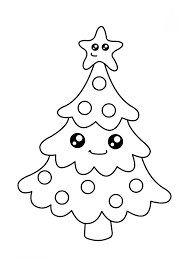
Few more Christmas Tree Drawings for Kids
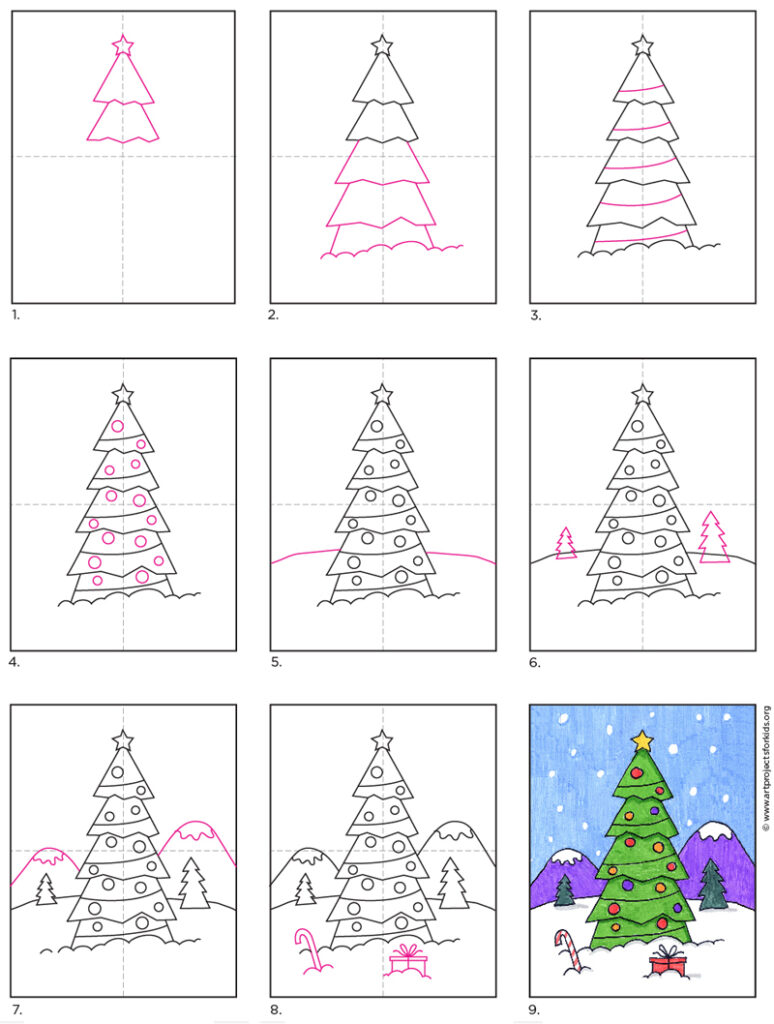
Here’s a step-by-step guide to drawing a Christmas tree:
Step 1: Draw the Tree’s Basic Shape
- Sketch a triangle shape to outline the overall size and height of the tree. This will act as your guide for the tree’s structure.
Step 2: Segment the Layers
- Divide the triangle into three to five sections, with each section getting wider as it moves down. These will represent the layers of the branches.
Step 3: Draw Branches and Needles
- Begin at the top and sketch zigzag or wavy lines for each layer to create the effect of pine needles. Let the edges be slightly irregular for a natural feel.
Step 4: Add the Tree Trunk
- Draw a rectangular trunk at the bottom of the tree. Make it slightly narrow to match the proportions of the tree.
Step 5: Add Decorations (Optional)
- Lightly sketch in baubles, lights, or stars along the branches. Place a star or other ornament at the top.
Step 6: Draw Presents under the Tree (Optional)
- Add rectangles and squares at the base to represent wrapped gifts.
Step 7: Shade the Tree for Depth
- Add light shading along one side of the branches to create a shadow effect. Use small strokes to mimic the texture of needles.
Step 8: Detail the Ornaments
- Use circles for baubles, wavy lines for tinsel, and loops for garlands. You can also sketch small bows or candy canes.
Step 9: Refine the Outline
- Erase any unnecessary guidelines. Make the branch edges sharper and more defined.
Step 10: Add Final Touches
- Shade the trunk and the ground slightly to add dimension. Highlight some parts of the tree with lighter lines for a realistic touch.

Skilled teacher, knowledgeable in and in adapting state content standards to individual needs in
Elementary-6th grade classrooms. Utilizes instructional materials, technology, and teaching methods to
engage students in effective learning opportunities in individual, small group, and whole-group settings to
maximize instructional time. Differentiates instruction for ELLs while exposing them to rigorous content,
with a focus on literacy skills in all subject areas. Establishes and maintains appropriate standards of
behavior in an inclusive and respectful environment for students from all socio-economic and cultural
backgrounds. Develops lesson plans using Backwards Planning Method to align content standards and
assessments with effective learning activities. Communicates and collaborates effectively with staff and
parents, and creates a safe and positive learning environment for students. Has taught in both in-person
and virtual environments. Professional Communicator with 20+ years of experience.

