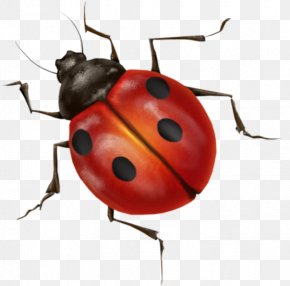
How to draw a ladybug more commonly referred to as lady beetles or ladybird beetles is a kid’s and beginner’s guide. The ladybug is used in the majority of cultures as a sign of good fortune and is placed on cups, clothes, and other things to decorate.
If you are eagerly waiting to draw your own ladybug use this easy drawing which is extremely simple. Grab your pencil, paper, or perhaps also an eraser to correct your errors.
You can apply colors, paints, or whatever color choice you wish to use once your drawing is done. Each step is provided with an explanation and demonstration to assist you, step by step, and make your drawing.
How to draw a ladybug:
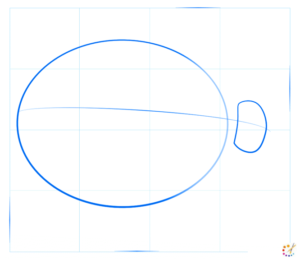
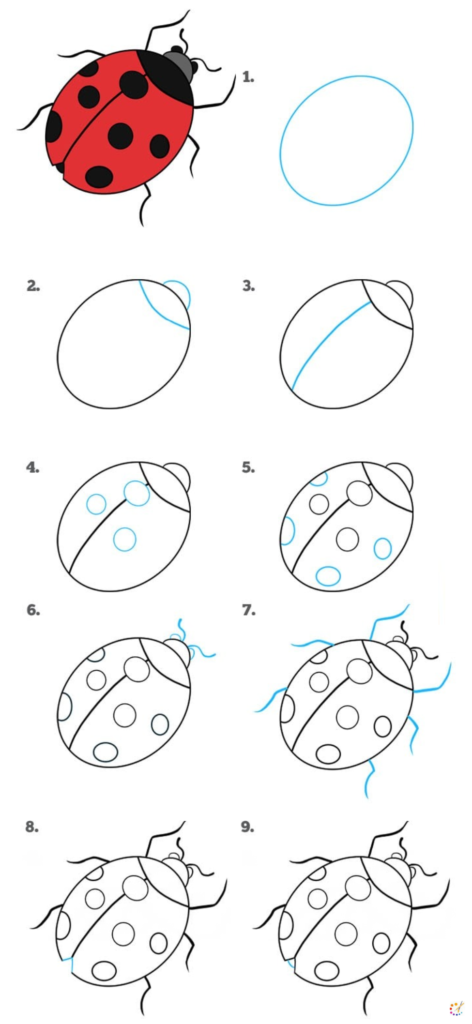
Step 1: Mark the height and width of the ladybug by observing it, its whole body is large and flat compared to the head. Draw a large fatty oval as the body and a small round head in front, draw a line to mark the center of the body with the head.
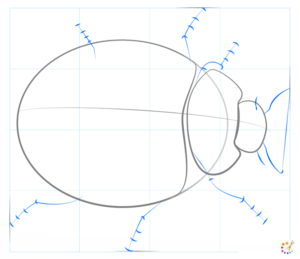
Step 2: Here we will begin to form the thorax, make a curved line in the top of the oval and make a curved box at the rear of the head.

Step 3: Draw leg guideline 2 pairs at the thorax joint and 1 pair at the rear, draw 1 pair at the top of the head.
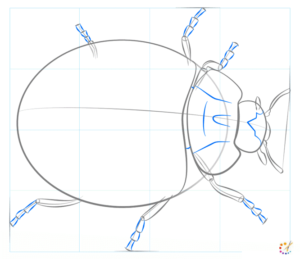
Step 4: In this step draw the first part of the leg which is longer than the second part, and draw the antenna.
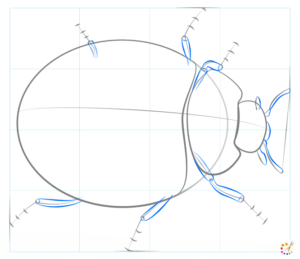
Step 5: Then further draw small parts of legs and a curved shape in the head, and add lines in the thorax.
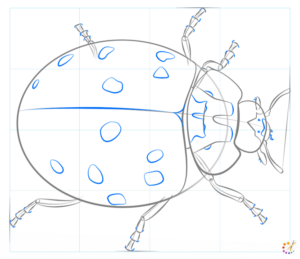
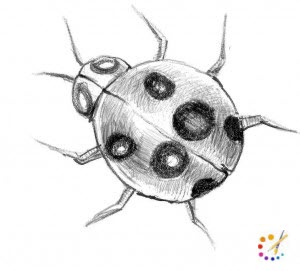
Step 6: Take care of the other details on the body of the bug, draw random patches on the body.
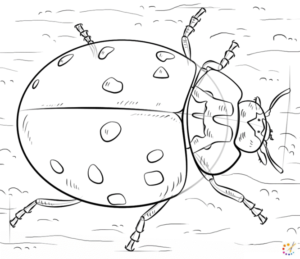
Step 7: As always, contour your sketch and vary the thickness and depth of same. Add shading and background to the foundation.
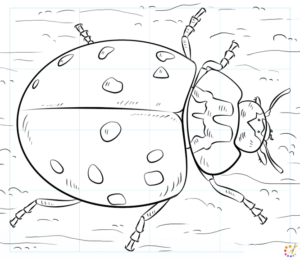
Step 8: Remove all guidelines to achieve the final sketch.
How to draw a step by step cartoon ladybug:
- To start a cartoon ladybug start with oval.
- Draw head and oval thorax for cartoon.
- Draw oval partition of the body using line.
- Draw circular patches on the entire body.
- Add 2 curved antennae on head.
- Then add 3 sets of legs with L shape line.
- Give back a v shape.
- Your cartoon bug is ready.
How to draw ladybug for kids:
Step 1: Draw a circle to start drawing.
Step 2: Draw the first set of legs on either side of the top side of the circle.
Step 3: Next draw the second set of legs and eyes for the bug.
Step 4: Draw the bug’s back legs, a curve around the eyes, and a straight line in the middle of the body.
Step 5: Draw small circles across the body.
Step 6: Draw 2 pointed antennas in the front section.
Step 7: Use the hatching technique to outline the drawing.


Skilled teacher, knowledgeable in and in adapting state content standards to individual needs in
Elementary-6th grade classrooms. Utilizes instructional materials, technology, and teaching methods to
engage students in effective learning opportunities in individual, small group, and whole-group settings to
maximize instructional time. Differentiates instruction for ELLs while exposing them to rigorous content,
with a focus on literacy skills in all subject areas. Establishes and maintains appropriate standards of
behavior in an inclusive and respectful environment for students from all socio-economic and cultural
backgrounds. Develops lesson plans using Backwards Planning Method to align content standards and
assessments with effective learning activities. Communicates and collaborates effectively with staff and
parents, and creates a safe and positive learning environment for students. Has taught in both in-person
and virtual environments. Professional Communicator with 20+ years of experience.