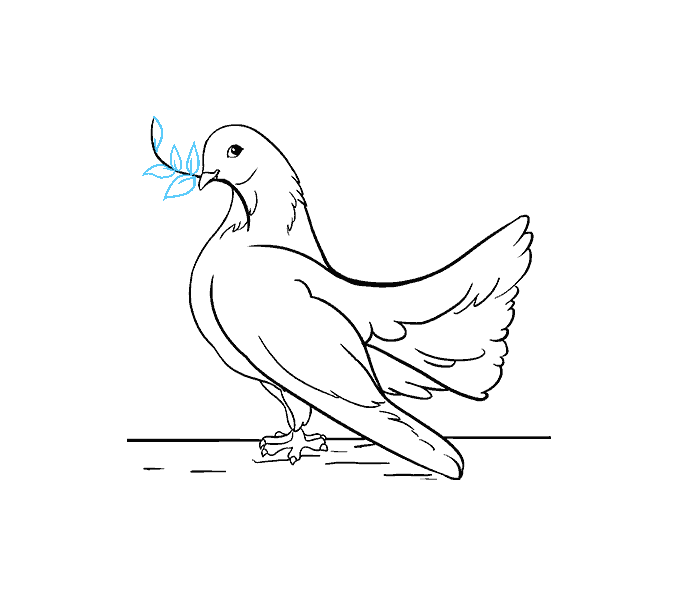
This tutorial is on step-by-step drawing a Dove for beginners and children. Doves are a symbol of, peace, love, and innocence. Dove also symbolizes a pacifist group, used in arts. It is a significant aspect of Christianity and Jewish cultural art.

A dove carrying an olive leaf in its beak is a sign of happiness and joy in life. They are white in color but in some areas exist in grey color also and known as pigeons. They possess homing behavior it means that they come back to the location where they were raised.

If you wish to draw your own Dove all you need is this tutorial, paper, pencil, and concentration.
How to Draw Dove Step by Step
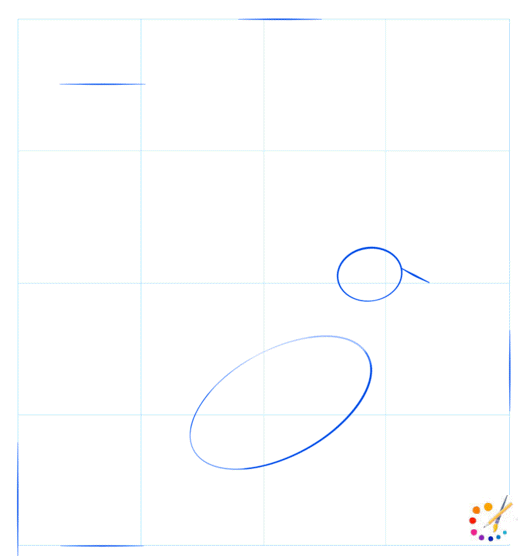
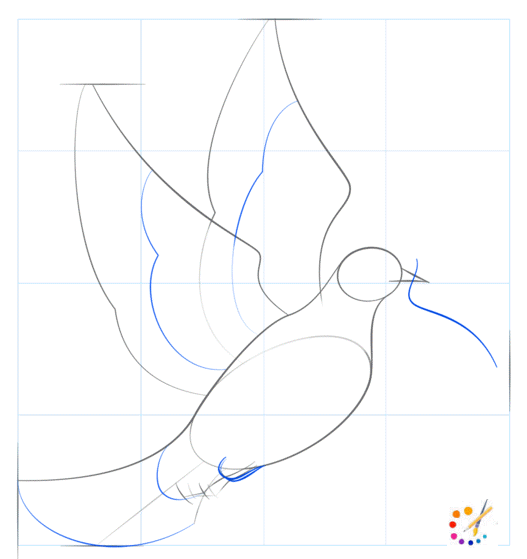
Step 1: Begin by sketching 2 ovals, small oval for head and on the right-hand side of the paper, and large oval at 45 degree for the rest of the body. Draw a line for beak outline.
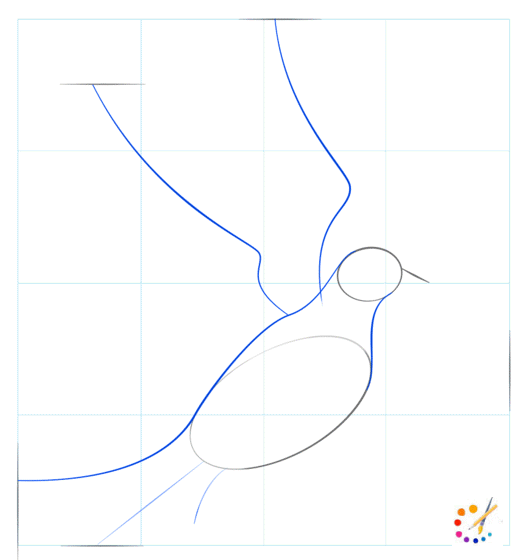
Step 2: Sketch the body of bird by joining both ovals with wavy lines. Sketch 2 lines for wing outline.
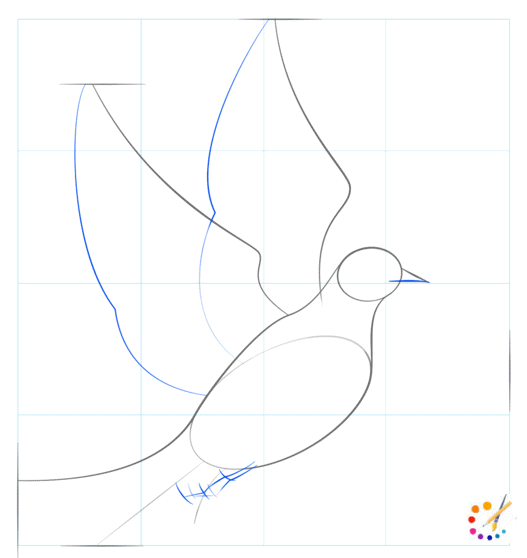
Step 3: From the drawn online for wing draw curve downwards towards the dove’s body. Draw a triangular beak.
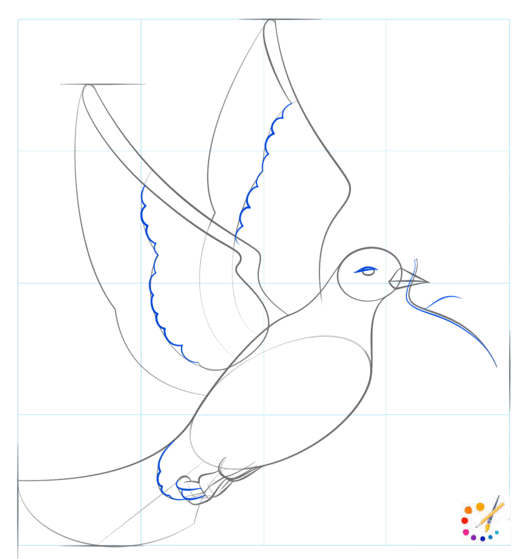
Step 4: Draw lines for the feather on the wings, and at the bottom of the body. Draw a smooth line for the olive branch in the dove’s beak.
Step 5: Draw the same line inside the wings, eyes, and legs of your bird.
Step 6: Draw several tiny curved lines for a feather on wings and tail draw details of the branch and eyes also.
Step 7: Draw lines in the wings and tails in a sloping manner, draw olive leaves.
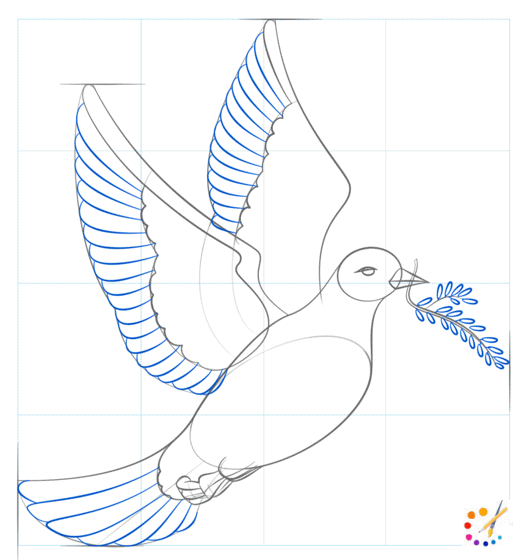
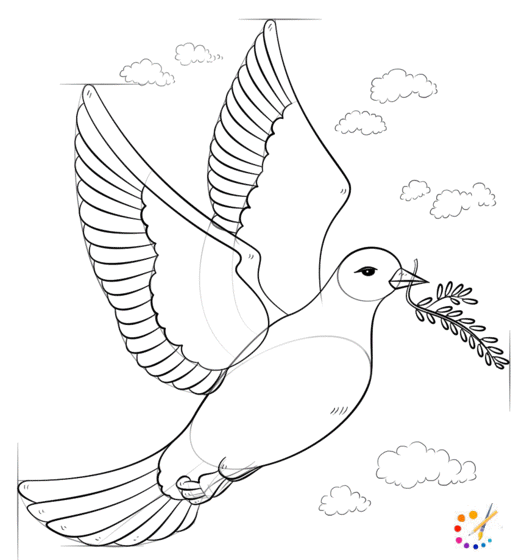
Step 8: Out line the form and structure of dove, draw a few clouds in the sky.
Step 1: Draw geometrical figures 2 ovals and 3 triangles. Small oval for head, large angular oval for body. Draw triangle at the start of large oval, from center draw small large triangle and then at oval’s end draw small triangle, see image below.
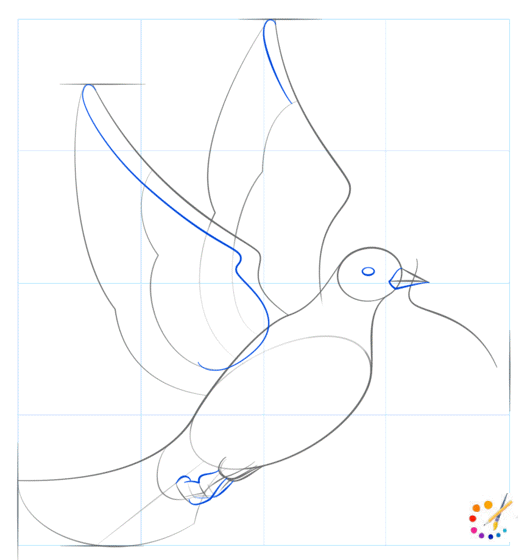
Step 2: Draw eyes f0r dove in the small oval and a beak at the tip.
Step 3: Begin to draw head moving towards neck. Draw the neckline to the body outline.
Step 4: Draw wings as per the triangle drawn in the center. Begin drawing a line in upward direction making angular curves and then towards body with small curves.
Step 5: Draw another wing on the triangle drawn on the start, it will project the right side of wings.
Step 6: Draw the lower body outline of the body. Draw the legs of the dove in this step.
Step 7: Draw tail for the dove, begin from one side, and once again draw the pattern drawn for the feathers.
Step 8:Remove all outlines drawn in form of geometrical figures. Draw a droplet close to the eyes of the bird.
If you practiced the same as demonstrated in the above tutorials, thats good.! But you can practice it with you imagination also. Always remember to experiment with your observation, it’s key to be a perfect artist.

You can learn more animal drawings like that as:


Skilled teacher, knowledgeable in and in adapting state content standards to individual needs in
Elementary-6th grade classrooms. Utilizes instructional materials, technology, and teaching methods to
engage students in effective learning opportunities in individual, small group, and whole-group settings to
maximize instructional time. Differentiates instruction for ELLs while exposing them to rigorous content,
with a focus on literacy skills in all subject areas. Establishes and maintains appropriate standards of
behavior in an inclusive and respectful environment for students from all socio-economic and cultural
backgrounds. Develops lesson plans using Backwards Planning Method to align content standards and
assessments with effective learning activities. Communicates and collaborates effectively with staff and
parents, and creates a safe and positive learning environment for students. Has taught in both in-person
and virtual environments. Professional Communicator with 20+ years of experience.