How To Draw Waves – Waves are also natural things and can be found in every sea and on any shore. Waves are not difficult to draw, and if a person practices drawing them once, then they are able to create very good-looking waves.
Here, we will demonstrate the easiest ways to draw waves for beginners step by step. Waves are among the most utilized shapes in art, and it is sometimes very simple to draw them with just a few strokes.
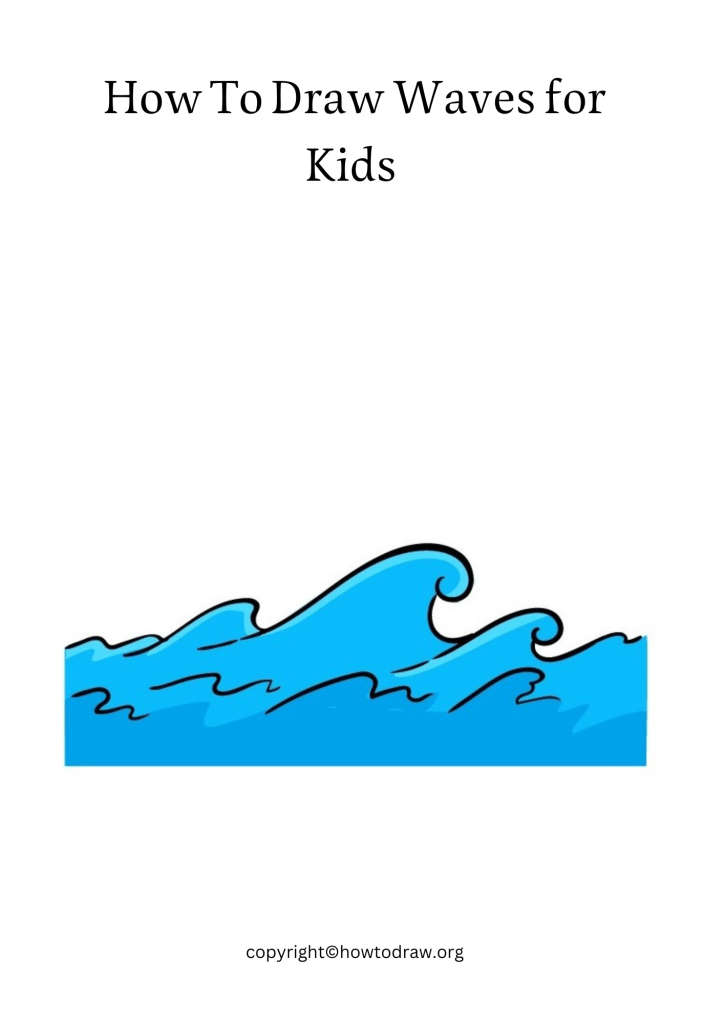
How To Draw Waves for Kids
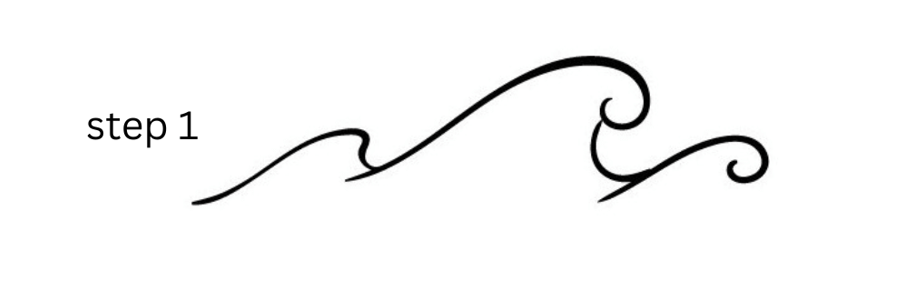
In this tutorial, we will teach you how to draw waves for children! The process is easy, and the outcome looks fabulous. Let’s begin! How To Draw Waves step by step. Discover steps on how to draw Waves in this simple tutorial!
When Draw waves with your hand can be of great help in boosting confidence. By bringing pen to paper and drawing a visual picture of the movement of water, you can take control of how you feel and think. Wave drawings can be utilized to concentrate and soothe feelings, encourage tranquillity, stimulate creativity, enhance well-being and quality of sleep.
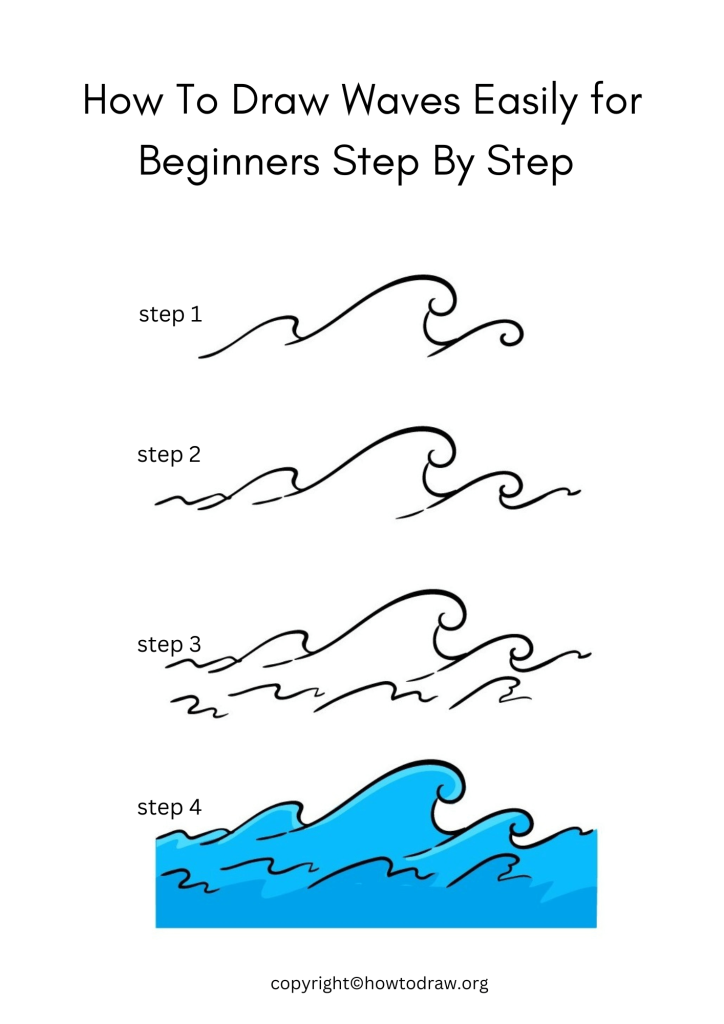
How To Draw Waves Easily for Beginners Step By Step
Waves are among the most popular and useful elements to draw. Waves produce a variety of different effects and bring your drawings to life. Here are some guidelines on how to draw waves:
1. Start by lightly sketching out a rough outline of the waveform with a pencil. Don’t worry too much about getting it perfect at this point – just get a rough idea of the shape of the waveform.
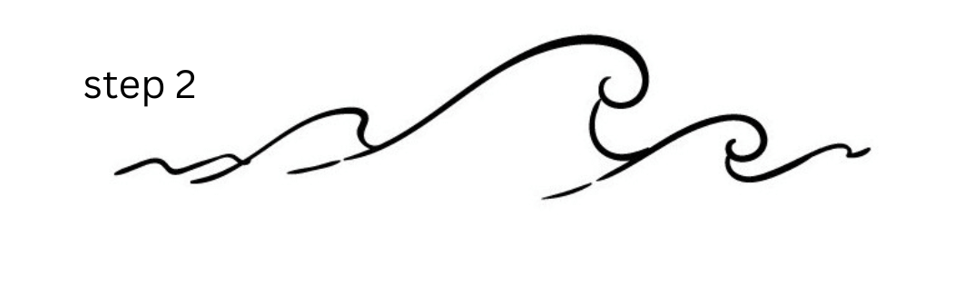
2. Next, begin adding some light highlights to your waveform using a #2 or HB pencil. This will provide it with some additional brightness and definition.
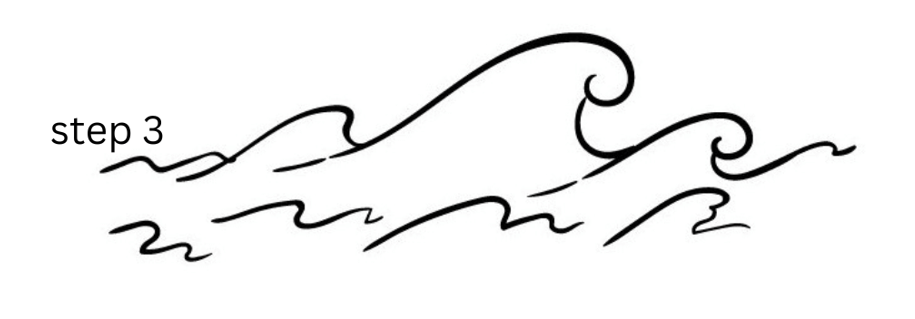
3. Begin adding darker regions to your waveform using a #4 or 4B pencil. This will create the effect of waves crashing against other waves (or perhaps making gradual progress along the shore).
Waves are a favorite topic among artists and designers, and they are one of the best ways to demonstrate movement and energy. Here, we will demonstrate how to draw A simple waves with basic shapes.
To conclude, Start with basic shapes. Begin first with a square or rectangle, and then divide it with the Rule of Thirds into thirds. Second, use the corners as references to draw curves along the outer perimeters of each piece. Third, use small circles or ovals to add some details. Be careful with details. First, draw in the crests, which are the curved lines that extend at right angles from the body of water. Second, draw in smaller waves or whitecaps along the crests.

Skilled teacher, knowledgeable in and in adapting state content standards to individual needs in
Elementary-6th grade classrooms. Utilizes instructional materials, technology, and teaching methods to
engage students in effective learning opportunities in individual, small group, and whole-group settings to
maximize instructional time. Differentiates instruction for ELLs while exposing them to rigorous content,
with a focus on literacy skills in all subject areas. Establishes and maintains appropriate standards of
behavior in an inclusive and respectful environment for students from all socio-economic and cultural
backgrounds. Develops lesson plans using Backwards Planning Method to align content standards and
assessments with effective learning activities. Communicates and collaborates effectively with staff and
parents, and creates a safe and positive learning environment for students. Has taught in both in-person
and virtual environments. Professional Communicator with 20+ years of experience.