In this tutorial, we will learn to draw ear for children and beginners, because the ear is an extruded structure on both sides of the face. The ear is utilized to hear, they give us balance in our physical actions like walking, running, and other activities. The ear is a vital structure in every animal primarily mammals.
If you are drawing a portrait or face ear plays an important role, if it is not in the right place it can be terrifying or ugly. While drawing mythological animals we draw funny and unique ears to make them different.
Humans pierce the lobe of the ear to wear jewelry for beautification. This ear drawing tutorial is good to start if you want to learn face drawing with perfect features.
How to Draw Ears Realistic
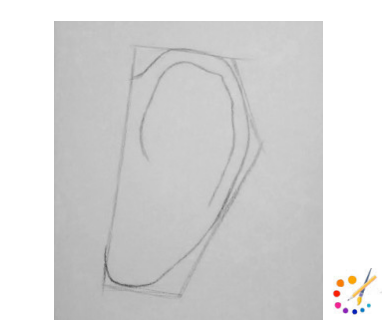
Step 1: With the use of a ruler draw a geometric shape of a pentagon like the one given below. Now draw a little curve on the left corner so that it appears round, then on the right-hand side of the pentagon again draw the curve to make it appear round like the ear.
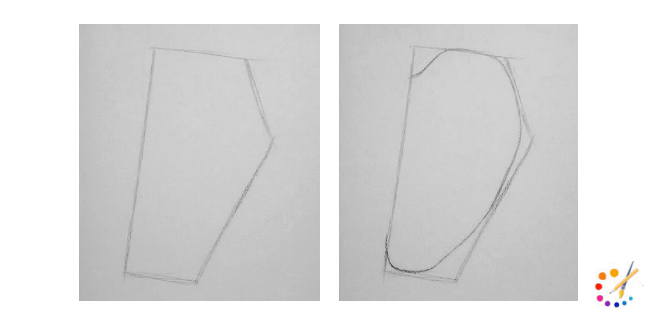
Step 2: Along the drawn upper semi curve draw another curve similar to it as shown in the figure.
Step 3: Every ear have a whole going inside the body, draw that from the center of the left side, it need not be specific shape as each human have a different ear shape.
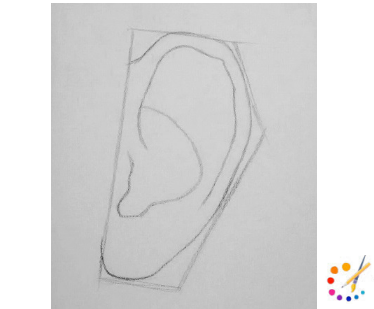
Step 4: In this step draw the nerves which are visible in-ear as you know it’s not flat.
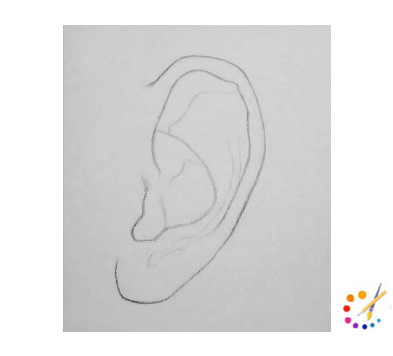
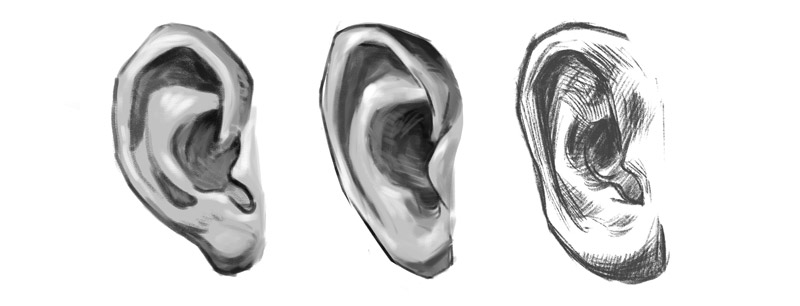
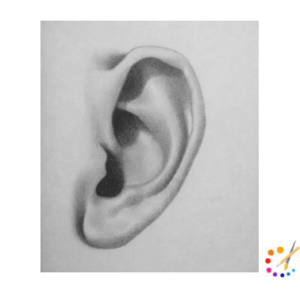
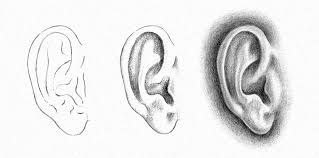
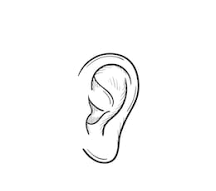
Step 5: Up to this step your outline for the ear is ready, erase all extra lines in this step. Use shading to contour and highlight the part of the ear it will give realistic look.
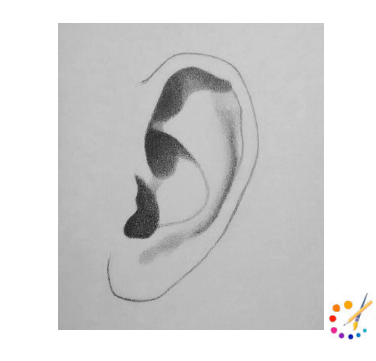
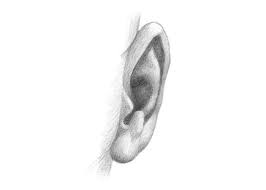
Step 6: This step depends on your creativity, you can shade it to look extruded from face. Refer the image below for assistance in shading and finishing touch.
How to Draw Anime Ear
Step 1: Draw an inclined large thick oval as the outline for drawing.
Step 2: Draw overlapped another oval at the bottom, it will illustrate the ear lobe. Draw the thicker and small oval.
Step 3: Then using both the ovals draw outline of whole ear, as you have seen your ear too… outline it accordingly, large curve at top and small slightly inward at bottom.
At this step your helix and lobe is ready.
Step 4: Draw outline for the rest of the parts too such as notch, anthelix and helix canals. Do it by placing different curvy lines as indicated in the picture.
Step 5: In this step give volume to the outline drawn for parts as ear is not flat part. With finishing notch you will define concha.

Step 6: Now you can paint your ear or color it as indicated in image to give it anime look.
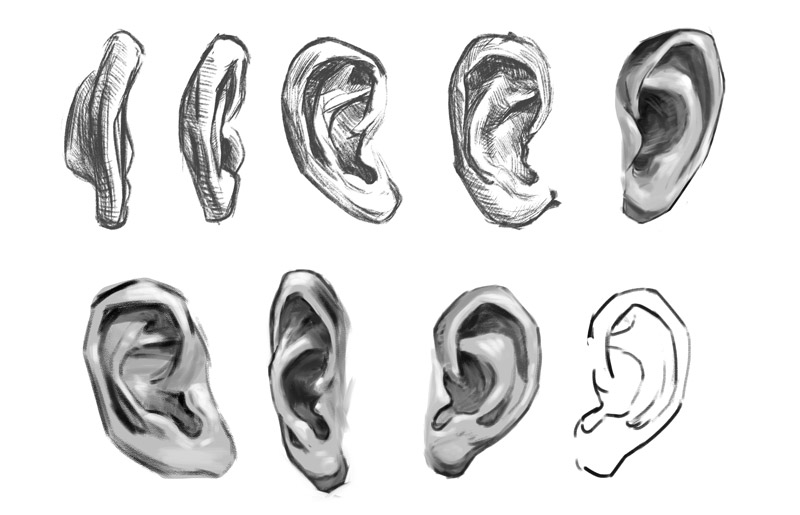
Drawing ear is easiest among all other features of face. Thus by only having clear observation you can achieve it. There is a basic shape but every human have different shape and size of ear thus, it makes ear drawing easy.

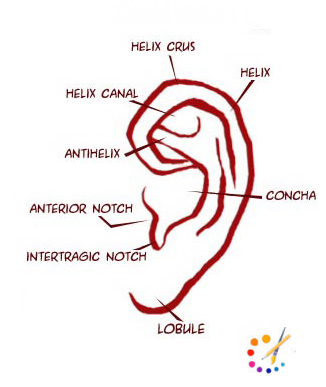
Here we are providing information regarding the basic parts of the outer ear part. It will definitely help you in your drawing.
You enjoys this drawing..! Good to here this. See our other drawing tutorials also as how to draw eyes, hairs, etc.

Skilled teacher, knowledgeable in and in adapting state content standards to individual needs in
Elementary-6th grade classrooms. Utilizes instructional materials, technology, and teaching methods to
engage students in effective learning opportunities in individual, small group, and whole-group settings to
maximize instructional time. Differentiates instruction for ELLs while exposing them to rigorous content,
with a focus on literacy skills in all subject areas. Establishes and maintains appropriate standards of
behavior in an inclusive and respectful environment for students from all socio-economic and cultural
backgrounds. Develops lesson plans using Backwards Planning Method to align content standards and
assessments with effective learning activities. Communicates and collaborates effectively with staff and
parents, and creates a safe and positive learning environment for students. Has taught in both in-person
and virtual environments. Professional Communicator with 20+ years of experience.