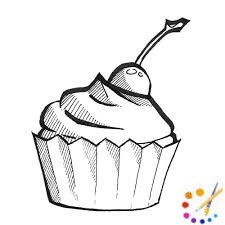
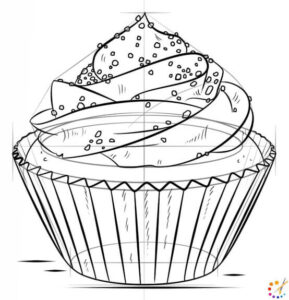
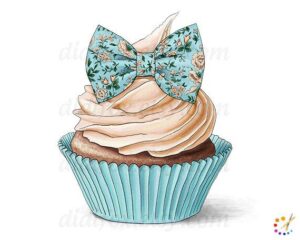
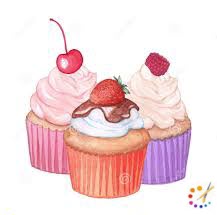
This article will be mouth-watering since we are going to learn how to draw a cupcake, today. Cupcakes are miniature version of cakes with icing on it in paper cups. In nations such as Australia, Britains these cupcakes are also known as fairy cakes. Generally foil paper, colored paper cups are used to bake these small sweet cakes and adorned with sprinkles, fruits, chocolates, and flavored icing of various kinds on top.
In 1796 an American chef illustrated cupcakes in his cookbook. In the very early invention days, they are also referred to as 123 cakes. The proportion of compositions utilized in the design is extremely simple- a spoon of soda with one cup of butter and the same quantity of milk, 2 cups of sugar, and three cups of flour utilize 4 eggs. A cupcake without frosting is referred to as a muffin. Subsequently with more and more experiments variety of cupcakes also grew with lots of flavors and decoration options.
How to draw cupcake step by step
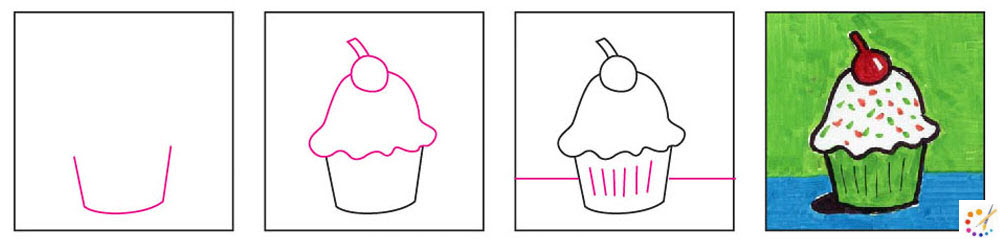
It’s easy to draw a cupcake for us, we consume them in our daily life and even prepare food. As a foundation draw a cup and then frosting with the shape that you desire. Color a cherry on top or any other top, chocolate cut you want to eat. Finish with other details as sprinkles and color them accordingly. They will denote the flavor of the cupcake. These are few simple examples following which is not difficult at all.
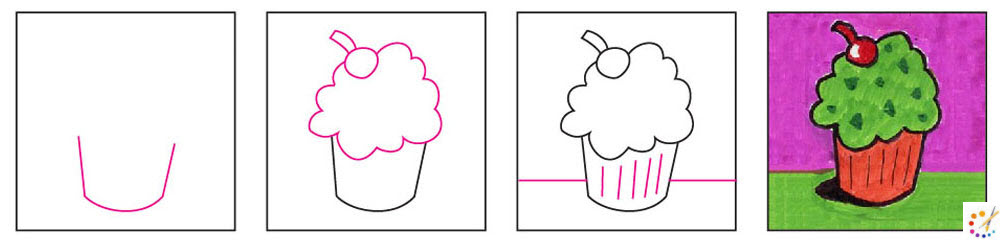
How to draw a cupcake :
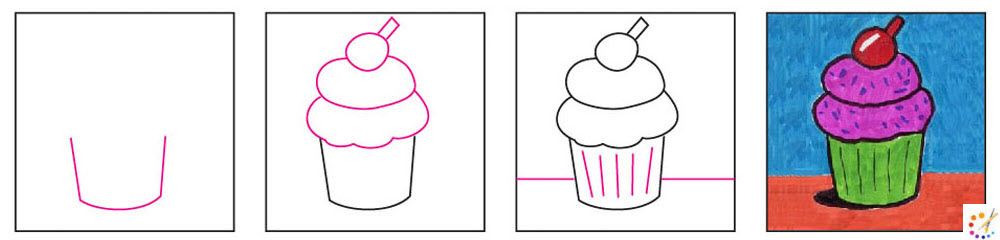
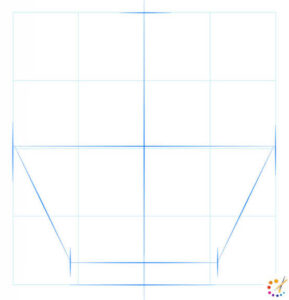
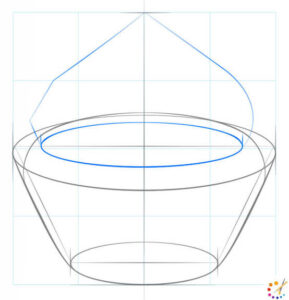
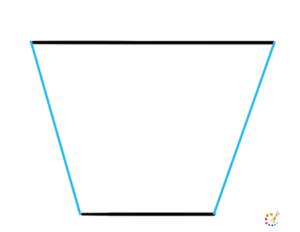
Step 1: Begin with a geometric base. Draw isosceles trapezium, draw a straight line with 2 angeled lines on both sides enclosed once more with a straight line on top, with a middle line perpendicular.
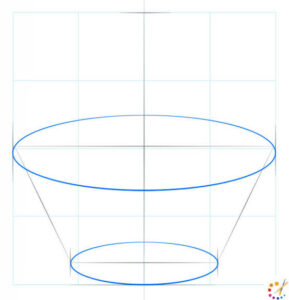
Step 2: Draw an oval keeping the top straight line diameter, same with the bottom line.
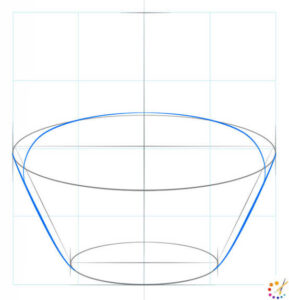
Step 3: Draw a curve inside the last drawn upper curve and project the sidelines.
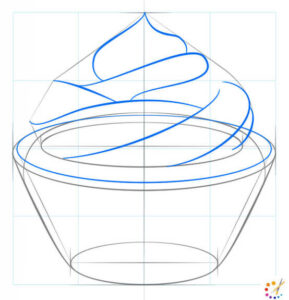
Step 4: On the top draw a small oval, above that draw 2 curves meeting each other at a point, it will form the frosting of the cupcake.
Step 5: Draw random curves in the top conical shape, nearly the spiral.
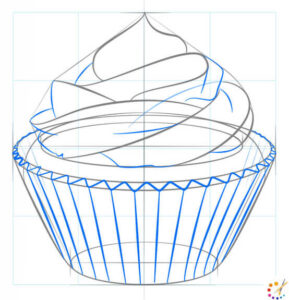
Step 6: Draw the base of the cupcake, Add straight lines in the cup base surrounded with the triangular zig zags.
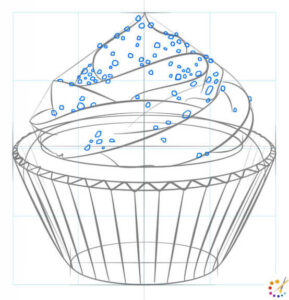
Step 7: Draw sprinkles on the frosting, add random small dots or circles.
Step 8: Darken the outlines using black color to make them prominent.
Step 9: Shade your cupcake and remove unnecessary lines.

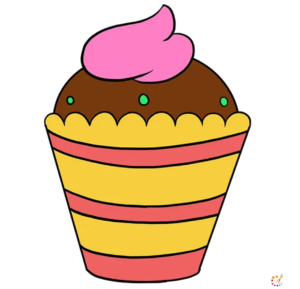
How to draw a cupcake for kids:
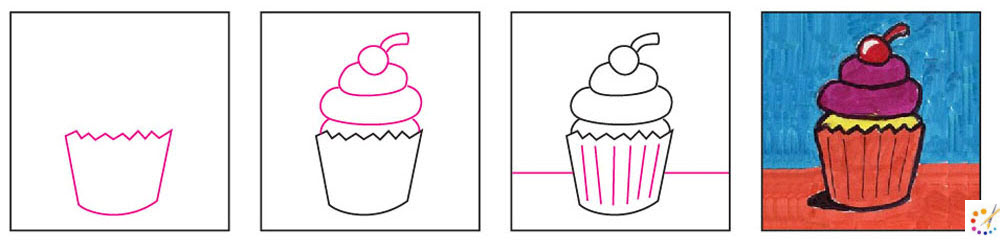
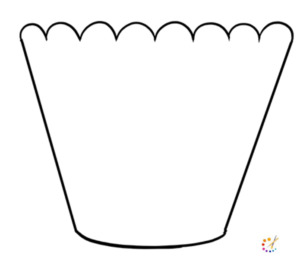
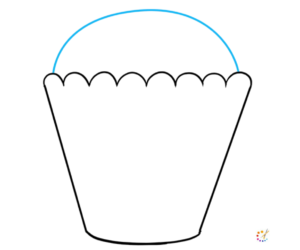
Step 1: Draw 2 parallel straight lines, the lower one smaller than the upper one.

Step 2: Connect both the lines with other straight lines and a quadrilateral will be formed
Step 3: At the top draw lots of small curves.
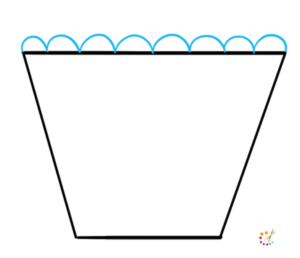
Step 4: Delete the top straight line, and the image shown below will be formed.
Step 5: Above draw a large curve from end to end.
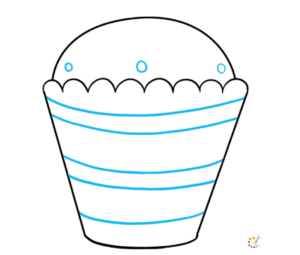
Step 6: Now draw 5 parallel lines in the cup region, and 3 small circles in the frosting.
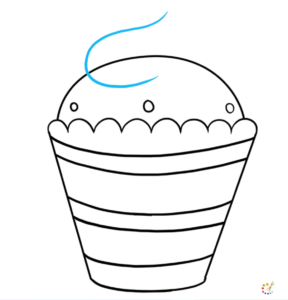
Step 7: At the top of the frosting, draw a second layer of frosting.
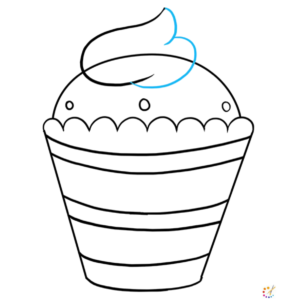
Step 8: Finish it with 2 little curves.
Step 9: Color your drawing in yellow, pink, and brown or with the colors of your preferred flavors.

Skilled teacher, knowledgeable in and in adapting state content standards to individual needs in
Elementary-6th grade classrooms. Utilizes instructional materials, technology, and teaching methods to
engage students in effective learning opportunities in individual, small group, and whole-group settings to
maximize instructional time. Differentiates instruction for ELLs while exposing them to rigorous content,
with a focus on literacy skills in all subject areas. Establishes and maintains appropriate standards of
behavior in an inclusive and respectful environment for students from all socio-economic and cultural
backgrounds. Develops lesson plans using Backwards Planning Method to align content standards and
assessments with effective learning activities. Communicates and collaborates effectively with staff and
parents, and creates a safe and positive learning environment for students. Has taught in both in-person
and virtual environments. Professional Communicator with 20+ years of experience.