Today’s tutorial is on how to draw a guitar which is a great instrument, and the tutorial is suitable for children and beginners. From the 1500s, guitar has been an instrument which has only 4 strings.
Guitars consist of wood and metal strings. Guitar images can be found in the painting of the medieval era. Guitars are also electric which was commonly utilized by performers and professionalists. The guitar has crucial roles in the country, folk, classical, or heavy metal type of music.
How to draw a Guitar
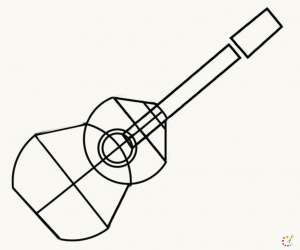
Step 1: The guitar is a long instrument, so sketch its outline by a round with a long diagonal line from its center. And also put 2 lines on this diagonal line.
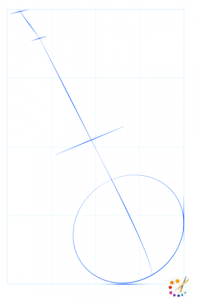
Step 2: Draw long slanted rectangle over the straight line with a other quadrilateral on top. For any confusion refer always to the given image. Draw a line in the middle of circle as center of it.
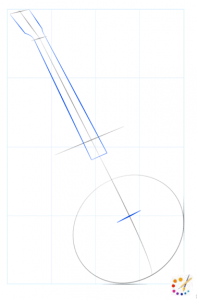
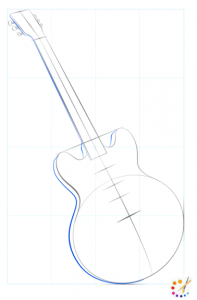
Step 3: Draw S and reverse s shape on the top of the round joining the long handle of the guitar.
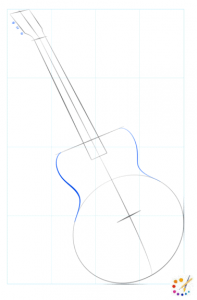
Step 4: From the top edge of both the S shapes draw a upside curve to form the guitar. Also, draw small circles with a small line with it on the top sides of the guitar.
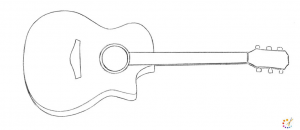
Step 5: Darken the outer line of the guitar, by drawing one more line attached to the wall. Double the lower outer line of the guitar body.
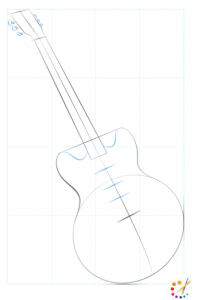
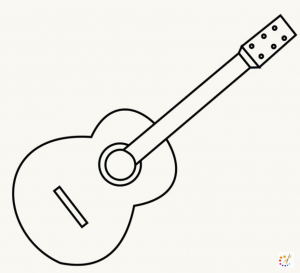
Step 6: Draw a rectangular box at the top of the guitar body and draw circles at the side cor5ner of it. And also draw circles at the string of it.
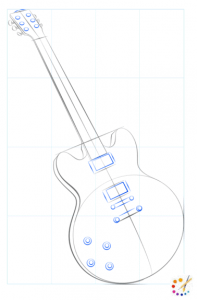
Step 7: Draw lots of horizontal lines crossing verticle lines on the string of the guitar. And then draw random patches at the body of the guitar.
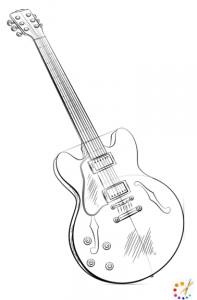
Remove excess lines outline entire drawing and complete your guitar drawing.
How to draw easy guitar for kids:
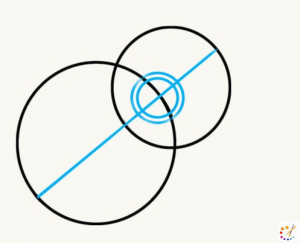
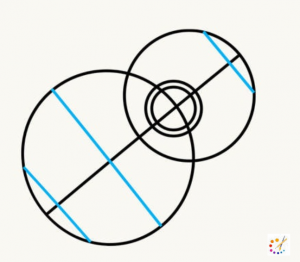
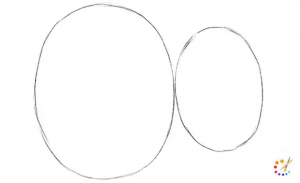
Step 1: Draw a large circle with a small one on the upper side adjacent to it. half of second circle overlaps the first circle.

Step 2: Draw an intersecting line with diagonal in 2 circles. Then draw small circles and parallel lines at the intersecting point of the first large circle and line.
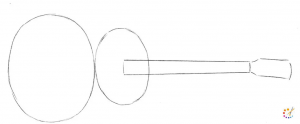
Step 3: On the top, bottom and the center of the circles draw 3 lines parallel to each other.
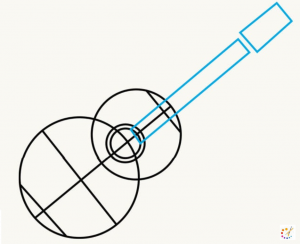
Step 4: Draw 2 parallel line going in the upward corner direction of the paper from the circle drawn in the center. Draw another rectangular shape above this rectangular shape.
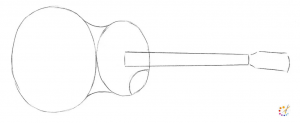
Step 5: For shaping guitar draw straight simple lines drawn in the below given 3 images.

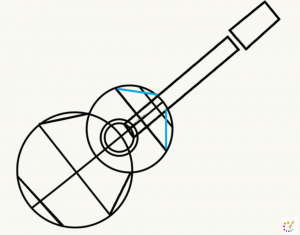
Step 6: Cancel out all the extra lines lying out of the straight lines in final step. You will be left with a geometrical figure.
Now give rounded edges to it and cancel overlapping lines lying within guitar.
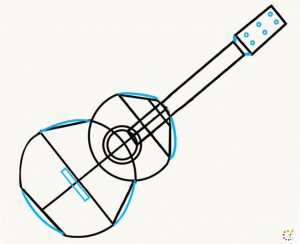
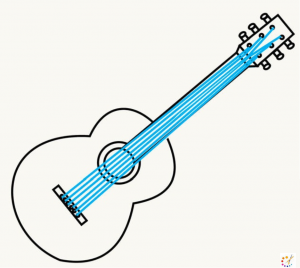
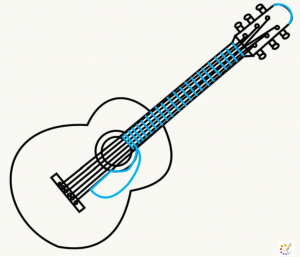
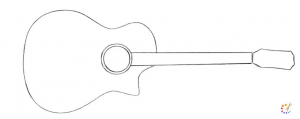
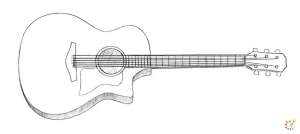
Step 7: raw long fine lines for the string running from bottom to top of guitar. Each string should be attached with pin drawn at top.
Draw verticle lines crossing these horizontal lines. Give top a curved shape and 2 curved lines moving in the center.
Step 8: After you finish you can color it with brown color which is renowned for the guitar.

Step by step guitar drawing tutorial:
Hope you have enjoyed the above provided tutorial on guitar drawing. Besides these, there is also an illustration provided below for you all.

Skilled teacher, knowledgeable in and in adapting state content standards to individual needs in
Elementary-6th grade classrooms. Utilizes instructional materials, technology, and teaching methods to
engage students in effective learning opportunities in individual, small group, and whole-group settings to
maximize instructional time. Differentiates instruction for ELLs while exposing them to rigorous content,
with a focus on literacy skills in all subject areas. Establishes and maintains appropriate standards of
behavior in an inclusive and respectful environment for students from all socio-economic and cultural
backgrounds. Develops lesson plans using Backwards Planning Method to align content standards and
assessments with effective learning activities. Communicates and collaborates effectively with staff and
parents, and creates a safe and positive learning environment for students. Has taught in both in-person
and virtual environments. Professional Communicator with 20+ years of experience.