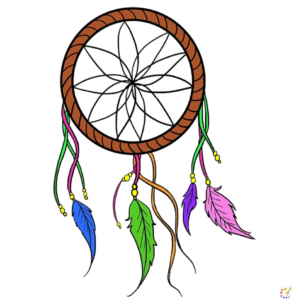
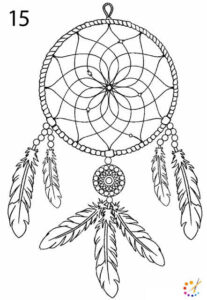
Learn to draw a dream catcher that is part of the American culture predominantly with the Ojibwe tribe. They would hang them as a wall hanging to trap the bad dreams and fear of any individual.
It is a ritual in which parents design the spider web within any round frame with numerous feathers hanging underneath it. It is a step-by-step guide below to tell you how the process of drawing it goes. Although in real life it is designed with wood, thread, beads, feathers, and lots of other ornamental objects.
Prepare to learn how to draw a dream catcher in a step-by-step manner easily and simply. Apply any style, color, or pattern to make your drawing.
How to draw a dream catcher for kids
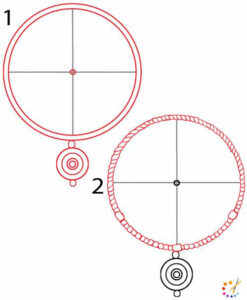
Step 1: To start your drawing, draw 2 circles, the first large and the second inside. Circles must be large in size and parallel to one another having the same center.

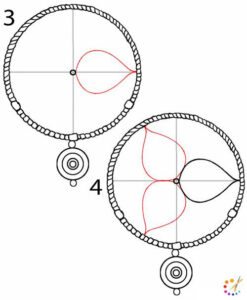
Step 2: After finishing with circles draw a leaf beginning from the center with 2 curved lines, and continue drawing other leaves overlapping one another from the bottom point.
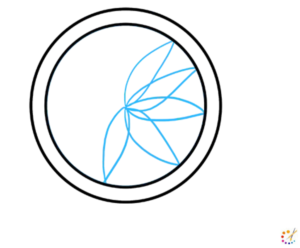
Step 3: After you will get the pattern of the leaves it will be simple for you to draw, continue drawing leaves until the entire circle is filled.
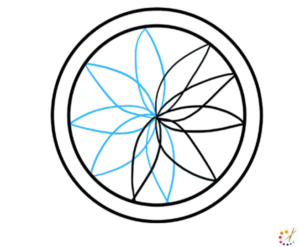
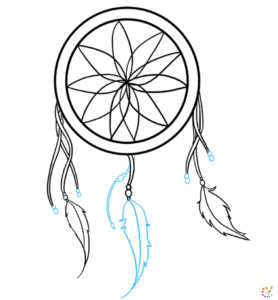
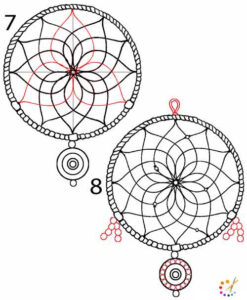
Step 4: Make long curved strings on both sides of the circle. Make 3 strings with double line and convert it into pointed ends. A small string make in the center of the circle with small 2 circles.
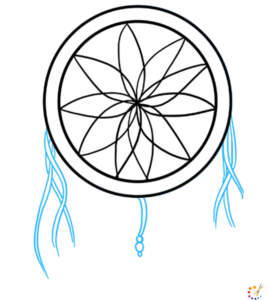
Step 5: On the ending of the strings begin making feathers, make a small circle and begin 2 curved line from it then connecting it with other curved lines and it will shape a feather.
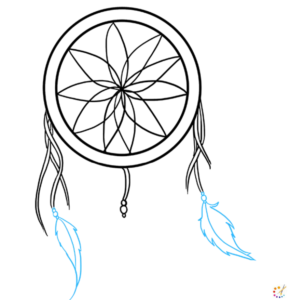
Step 6: With the middle ribbon draw the third feather, in the middle of it draw its vein and the sharp end of it. From the top of this ribbon draw another ribbon with beads.
Step 7: Draw small parallel curved lines in between the gap of 2 circles as shown below.
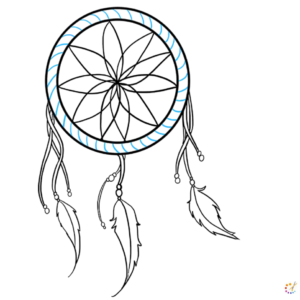
Step 8: Draw some hanging hoops to adorn its appearance, use curved lines curving into the sharp end.
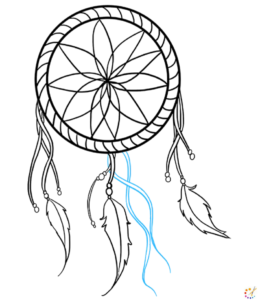
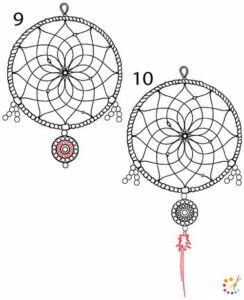
Step 9: Add a couple more decorations to the dreamcatcher, you can add a couple more feathers with some beads to it. Also, add tiny veins to the feather going outwards from the center vein.
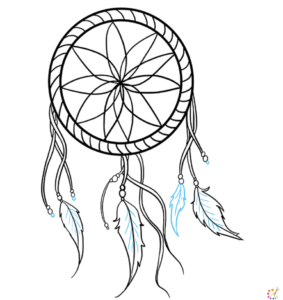
Step 10: After you have finished your drawing add attention-grabbing and bold colors to it. You can use combinations of red, blue, green, brown, and border it with black.
How to draw easy Dream Catcher:
- As a guideline for your sketching draw 2 next to each other circles of the same center and a little circle at the outside wall then a few little circles of the same center.
- Draw 2 perpendicular crossing lines as guidelines to draw a ornamental central piece of it.
- Then draw short lines and make the spiral pattern across the circle. Place 3 beads of the same distance to make it more ornamental.
- Then draw 2 curves from the center on both sides of the crossing lines. Curves must start from the same place and end at a point with a pointed tip.
- Then draw 2 more same leaf shape as given below in picture 4 with the same base.
- Since we have drawn leaf petals in the previous step use the same method and draw 3 more overlapped petals from the last one you drew.
- Remember that each 2 petals are opposite to one another and in opposite directions.
- Study picture 6 carefully and observe how some additional petals have been drawn. These patterns will create small closed shapes in the center of the drawing.
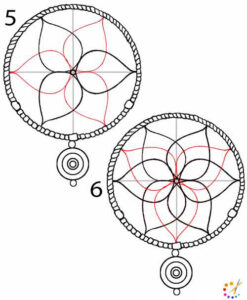
- Don’t be puzzled, look at the picture carefully, you’ll have a pattern. Again opposite to already drawn petals are these petals.
- Draw set of small circles on either side of outer wall of the circle and beads.
- Draw hanging hoop at the top of catcher.
- Ornament the lower small circle with beads and begin drawing the upper part of feather and vein as indicated in picture 10.
- On one side of the vein begin drawing curved projections from the end towards the tip.
- Finish the feather repeating the same procedure on the opposite side as well.
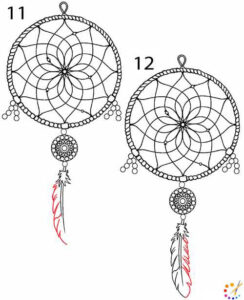
- Draw several feathers connected with beads drawn during the previous steps.
- Draw 3 feathers in the center and 2 feathers connected with the side beads.
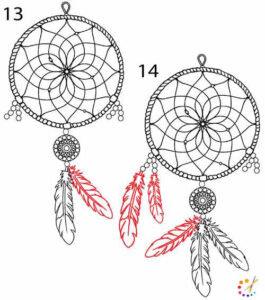
- Once you’ve finished the main picture, you can play with the decorations and general dream catcher.
- You can add colors to the web pattern and turn it into a fun activity.

Skilled teacher, knowledgeable in and in adapting state content standards to individual needs in
Elementary-6th grade classrooms. Utilizes instructional materials, technology, and teaching methods to
engage students in effective learning opportunities in individual, small group, and whole-group settings to
maximize instructional time. Differentiates instruction for ELLs while exposing them to rigorous content,
with a focus on literacy skills in all subject areas. Establishes and maintains appropriate standards of
behavior in an inclusive and respectful environment for students from all socio-economic and cultural
backgrounds. Develops lesson plans using Backwards Planning Method to align content standards and
assessments with effective learning activities. Communicates and collaborates effectively with staff and
parents, and creates a safe and positive learning environment for students. Has taught in both in-person
and virtual environments. Professional Communicator with 20+ years of experience.