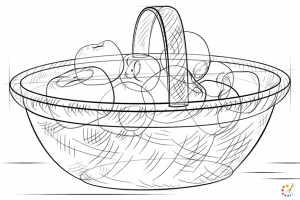
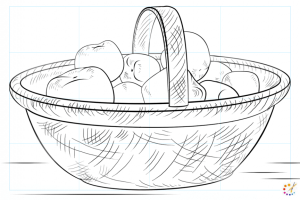
The drawing tutorial on drawing a fruit basket is for kids and beginners, a basket which is filled with bananas, oranges, apple, and other fruits.
You can learn basket drawing and fruit drawing separately also. But this is a combined tutorial which may look a bit complex to you. We have described the tutorial with the images which are needed for your convenience.
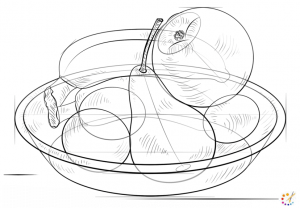
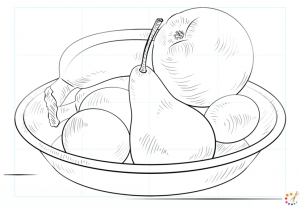
Different drawings of the basket with fruits have been provided for your assistance. Follow any of them which you found easy and convenient to draw.
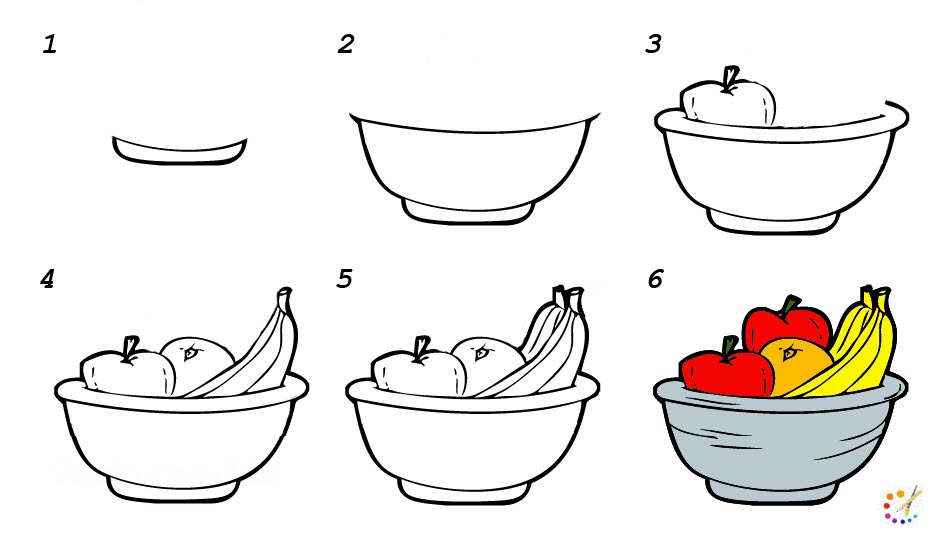
How to draw a fruit basket
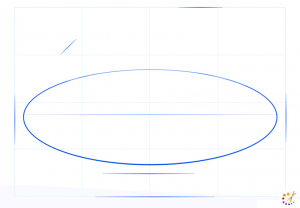
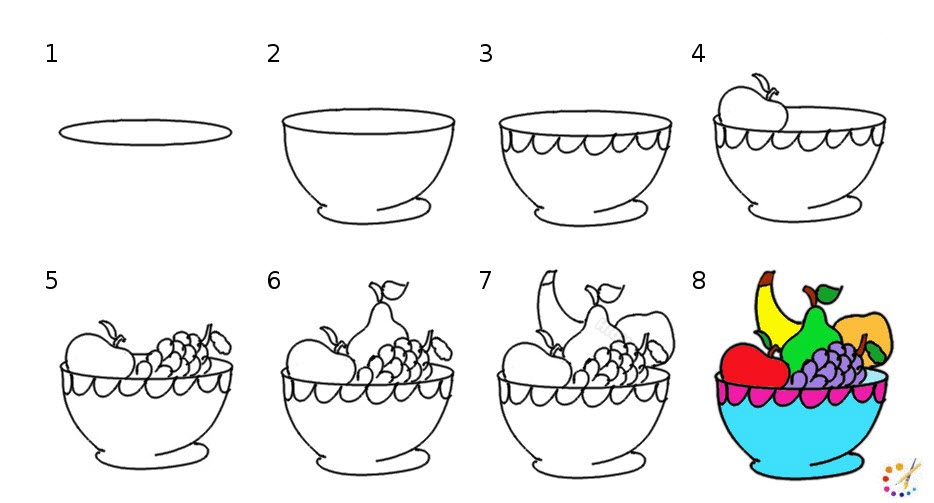
Step 1: At the start of the fruit basket drawing you need to begin with drawing a line with a mark on the middle of it.

Step 2: Draw an oval around the line drawn as mouth and bowl opening. Draw a half-circle from one end of the oval to the other end of the oval.
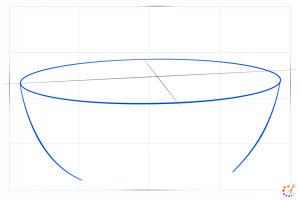
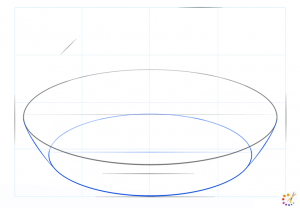
Step 3:Draw a large parallel oval around the small oval, the bowl opening. Draw a curved line from one side of the oval to the other side, creating a handle for the basket.

Step 4: Double the line of the handle with the same shape intersecting at a point. Again draw an oval in the center of the bottom of the bowl.
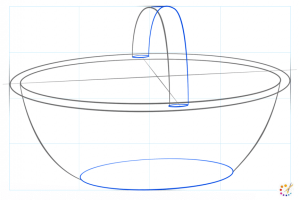
Step 5: After preparing the bowl draw numerous random guideline for apples overlapping one another.
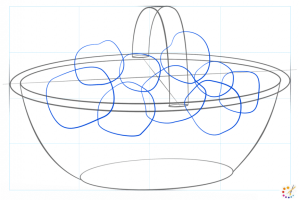
Step 6: Indicate the random ovals on the shape of the fruit for the top and beginning of the apple. Draw a curved line in the bowl parallel to the opening.
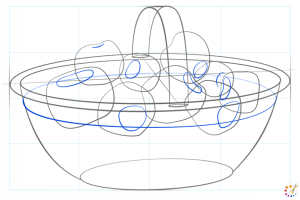
Step 7: To make the basket and fruits effective draw random diagonal lines and cross lines. You can use the hatching method also for this.
Step 8: After completing the drawing complete the drawing, contouring.
How to draw a fruit basket for kids:
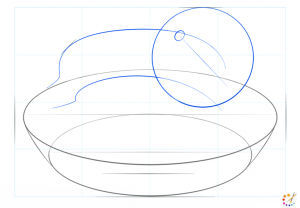
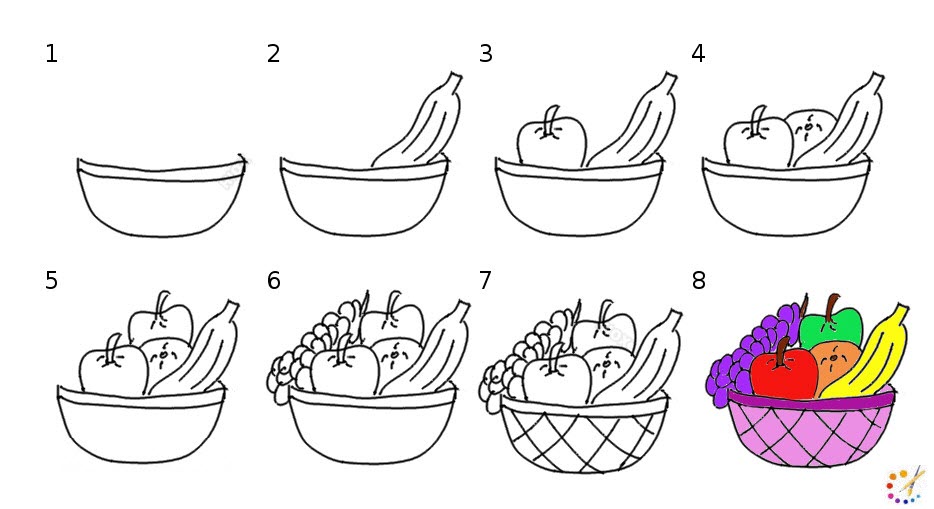
Step 1: Begin with drawing bowl opening, for that draw a oval shape as starting point. Draw a line in center as guideline and a line below it.
Step 2: In center of lower line of oval draw one more oval and connect both with 2 curved lines from side.
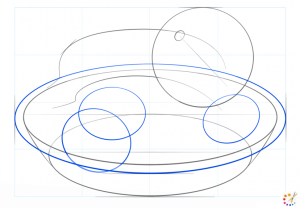
Step 3: Draw series of 2 curves on the line of oval. Draw a circle covering this curve.
Step 4: Draw a big oval around the opening of bowl. Then draw 3 ovals inside them for fruit guideline.
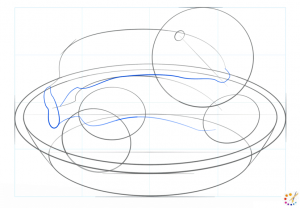
Step 5: Provide the curve drawn in the previous step shape of banana with the stem. Refer to the given image.
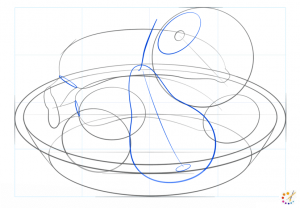
Step 6: Draw some fruit shape as pear orange apples inside the basket.
Step 7: Perform the hatching technique in some areas on the fruits and the basket.
Step 8: After you have finished, remove all the overlapping lines so that the picture of the fruits will be visible.
Step by step fruit basket drawing:

Skilled teacher, knowledgeable in and in adapting state content standards to individual needs in
Elementary-6th grade classrooms. Utilizes instructional materials, technology, and teaching methods to
engage students in effective learning opportunities in individual, small group, and whole-group settings to
maximize instructional time. Differentiates instruction for ELLs while exposing them to rigorous content,
with a focus on literacy skills in all subject areas. Establishes and maintains appropriate standards of
behavior in an inclusive and respectful environment for students from all socio-economic and cultural
backgrounds. Develops lesson plans using Backwards Planning Method to align content standards and
assessments with effective learning activities. Communicates and collaborates effectively with staff and
parents, and creates a safe and positive learning environment for students. Has taught in both in-person
and virtual environments. Professional Communicator with 20+ years of experience.